LAMP
Physical Computing · Core Lab, sophomore fall · Solo project
Overview
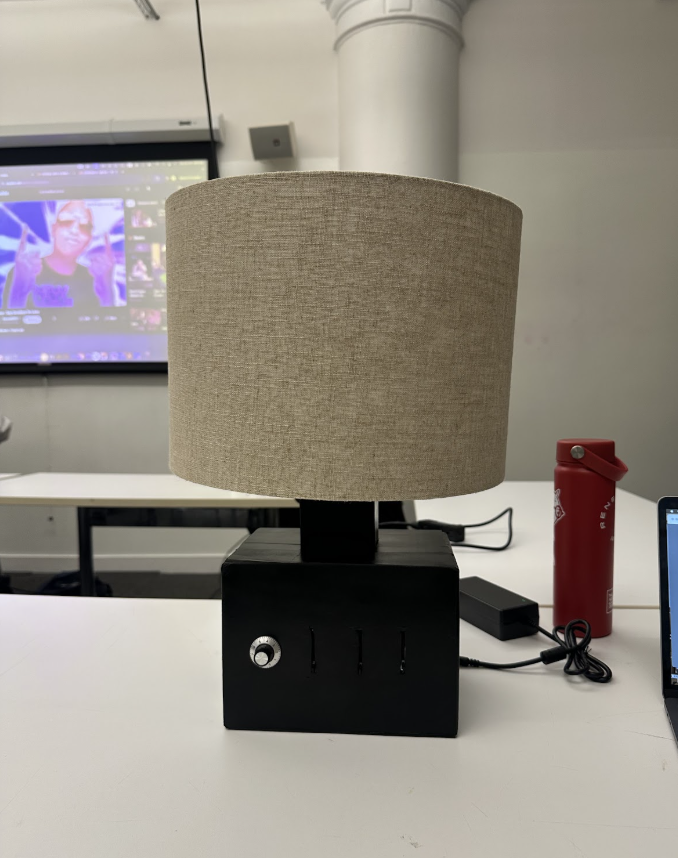
A table lamp you tune by hand. Three knobs mix red, green and blue light, and a fourth sets the brightness. It was the first thing I ever built, for my first-semester Core Lab project.
Concept
The brief was open: make an object with Arduino. I wanted something I would actually keep on my desk, so I started with the most familiar object I could think of and gave it one new trick.
Most color-changing lamps hide their controls in an app or a remote. I wanted the color to live on the lamp itself, so you turn a knob and watch the light respond, the same way you would mix paint.
Moodboard
Classic table lamps with square bases and fabric shades on one side, the RGB color wheel and a row of potentiometers on the other. My sketches put the two together: a cube base that holds the electronics, with the controls on its face and the light under a shade.
Build
I prototyped the circuit on a breadboard first, wiring the potentiometers to the Arduino and testing them against a strip of addressable LEDs until each knob drove the color I expected.
Then I moved everything into the body. The whole base is cardboard, cut, glued and painted black, with slots for the slider knobs and the dial. Inside, the LED strip is coiled up into the neck so the light throws up into the shade. I kept cardboard for the final piece and spent the time on finishing instead, so it reads as a real object on a table.
Code
Each pass of the loop reads the knobs, maps each one from 0–1023 to a 0–255 color value, and sets every pixel on the strip to the mixed color.
// <Led.Collection> NeoPixel.h === Library
#include <Adafruit_NeoPixel.h>
#ifdef __AVR__
#include <avr/power.h> // Required for 16 MHz Adafruit Trinket
#endif

// (<Collection.Define PINs))
#define PIN 6
#define NUMPIXELS 200
Adafruit_NeoPixel pixels(NUMPIXELS, PIN, NEO_GRB + NEO_KHZ800);

// (Defined) - SET.Potentiometer.Pins
#define DELAYVAL 500
#define LED_PIN 11
#define POTENTIOMETER_PIN A0
#define POTENTIOMETER_PIN2 A3
#define POTENTIOMETER_PIN4 A4
#define POTENTIOMETER_PIN3 A2

float brightnessFull = 1.0;

void setup() {
#if defined(__AVR_ATtiny85__) && (F_CPU == 16000000)
  clock_prescale_set(clock_div_1);
#endif
  pixels.begin(); // INITIALIZE NeoPixel strip object (REQUIRED)
  pinMode(LED_PIN, OUTPUT);
  Serial.begin(9600);
}

void loop() {
  pixels.clear(); // Set all pixel colors to 'off'
  int potentiometerValue = analogRead(POTENTIOMETER_PIN);
  int brightness = map(potentiometerValue, 0, 1023, 0, 255);
  int potentiometerValue1 = analogRead(POTENTIOMETER_PIN2);
  int brightness1 = map(potentiometerValue1, 0, 1023, 0, 255);
  int potentiometerValue2 = analogRead(POTENTIOMETER_PIN4);
  int brightness2 = map(potentiometerValue2, 0, 1023, 0, 255);
  brightnessFull = analogRead(A2) / 1023.0;
  Serial.println(brightnessFull);

  for (int i = 0; i < NUMPIXELS; i++) { // For each pixel...
    pixels.setPixelColor(i, pixels.Color(brightness2, brightness1, brightness));
  }
  pixels.show();
}
Reflection
This project is where I learned the basics I still use: reading analog inputs, mapping values, driving addressable LEDs, and moving a circuit off the breadboard into a real enclosure. It also taught me that the finish matters as much as the electronics. A plain cardboard box became something people assumed was bought, because of the paint, the proportions and the shade.
Next time I would build the base from wood or 3D-printed parts, solder the circuit onto a permanent board, and add presets so a favorite color is one tap away.
Technologies Used
- Arduino Uno
- Adafruit NeoPixel LED strip
- Potentiometers (×4)
- Cardboard and acrylic paint